Intro Comments: A GREAT BIG THANKS to TheNewX (Jason & admins) for running such a great and informative site, and to all of you members who have contributed such great and useful knowledge that has inspired and directed me in the building of my X.:notworthy:
Absolutely, there is no way I'd be anywhere even close to where I'm at without the influence of this site. I've been into 4x4's a lot in the past, but getting my X and finding this place has given me a whole new appreciation for this hobby and passion all over again.
Having the time of my life!!!!!!!! :
: 
- Dave
Username: maXTERRA
Make: Nissan
Year: 2006
Model:❌terra
Trim: S Titan-Swapped
Color: Night Armor
MODS
Armor:
I try to build all my accessories...
# maXTERRA sliders
# maXTERRA Custom tube-prerun styled front bumper with Milemarker winch
# maXTERRA Custom rear bumper with flush hitch receiver. Hidden safety chain mounts. # Recovery Points. CB antenna mount. Hi-lift mount.
# Custom drop-in cargo rack on roof rack
Suspension:
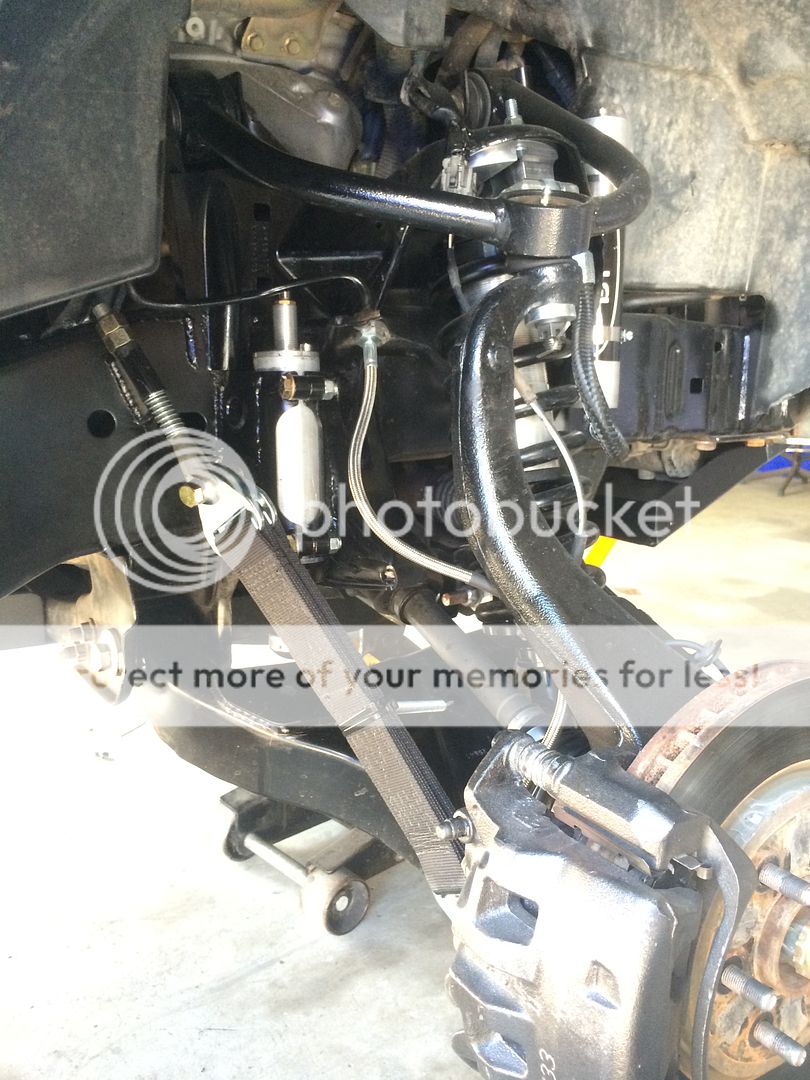
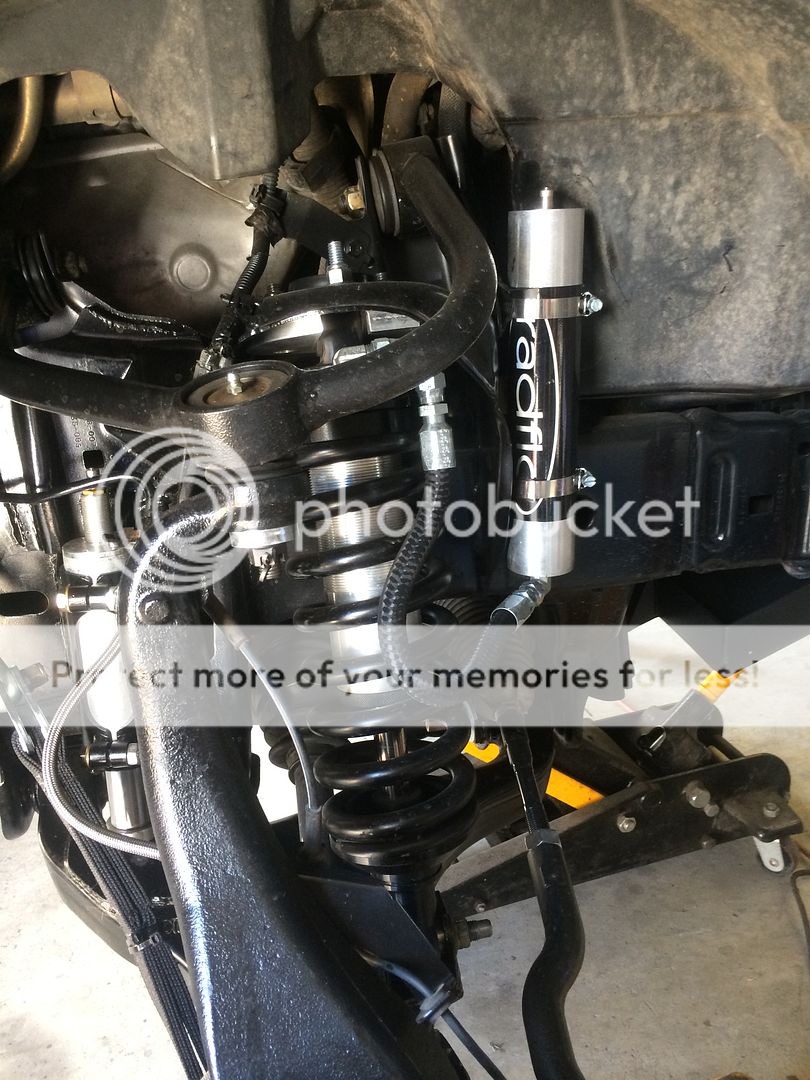
# 2.0" Radflo Coilovers (front)
# PRG UCA's
# Deaver AAL’s (rear)
# Bilstien 5125 Shocks (rear)
# Removed Rear Swaybar
# Skid plated u-bolt plates
Tires & Wheels:
# Wild Country XTX 285/75R16 Tires
# Stock wheels
# Matching spare wheel/tire on rear bumper swing out
Recovery Gear:
# MileMarker 9.5 Winch (w/ Viking Blue Synthetic Rope, MileMarker billet Hawse Fairlead (polished) and self closing hook)
# 2.5"x30' Recovery strap
# 48" Hi-Lift (All Cast)
# 4-ton bottle jack
# 3/4" & 5/8” Shackles
# Air compressor (compliments of a drawing here on the newX) and Tire Plug Kit
# Tool Kit
# Jumper cables
Electrical / Electronics:
# Cobra 75 WX ST CB w/ 4' Firestik
# Hella 700FF Driving Lights (mounted to bumper)
# 4” driving lights recessed in front bumper
# Carling Technologies Blue lighted rocker switches for lighting control
Interior:
# Nissan Seat Covers
# Nissan pet divider Net
Survival Gear:
#Jetboil Stove & extra fuel canisters. Mountain house rations, lifeboat rations, energy bars.
#2-man tent
#backpacker mattress & pillow, 20 deg sleeping bag
#Candle lanterns, lightsticks, LED flashlights, lots of extra batteries. LED headlamp.
# Katadyn water purification, iodine tablets.
# First aid kits.
# 2 gal collapsable bucket.
# rope & parachute cord.
# multitool
# Extra clothes & layers
# SPOT satellite tracker unit
Future Mods to-do list:
# Expedition roof rack and lighting.
# Fabricate full skid plates underneath.
# Full titan suspension & diff swap, lockers & gearing
# 35’s (if gearing/lockers ever come available)
# Stereo system upgrade
# Scangauge
# Fabricate a New design rear bumper with armored corners & integral steps.
# Gas & water cans storage.
# More winch, hi-Lift and recovery accessories.
# Extra battery in rear expanded storage compartment with battery isolator.
# ARB fridge
PHOTOS
Sliders fabrication

Sliders mounting

Checking the fit

Sliders installed

Rear bumper fabrication


Rear bumper done

PRG suspension install

New tires (285 XTX’s) Looks SO much better!

My drop in roof rack

Starting a new front bumper


Filler plates finally done

Bumper back from the powder coater

Absolutely, there is no way I'd be anywhere even close to where I'm at without the influence of this site. I've been into 4x4's a lot in the past, but getting my X and finding this place has given me a whole new appreciation for this hobby and passion all over again.
Having the time of my life!!!!!!!!
- Dave
Username: maXTERRA
Make: Nissan
Year: 2006
Model:❌terra
Trim: S Titan-Swapped
Color: Night Armor
MODS
Armor:
I try to build all my accessories...
# maXTERRA sliders
# maXTERRA Custom tube-prerun styled front bumper with Milemarker winch
# maXTERRA Custom rear bumper with flush hitch receiver. Hidden safety chain mounts. # Recovery Points. CB antenna mount. Hi-lift mount.
# Custom drop-in cargo rack on roof rack
Suspension:
# 2.0" Radflo Coilovers (front)
# PRG UCA's
# Deaver AAL’s (rear)
# Bilstien 5125 Shocks (rear)
# Removed Rear Swaybar
# Skid plated u-bolt plates
Tires & Wheels:
# Wild Country XTX 285/75R16 Tires
# Stock wheels
# Matching spare wheel/tire on rear bumper swing out
Recovery Gear:
# MileMarker 9.5 Winch (w/ Viking Blue Synthetic Rope, MileMarker billet Hawse Fairlead (polished) and self closing hook)
# 2.5"x30' Recovery strap
# 48" Hi-Lift (All Cast)
# 4-ton bottle jack
# 3/4" & 5/8” Shackles
# Air compressor (compliments of a drawing here on the newX) and Tire Plug Kit
# Tool Kit
# Jumper cables
Electrical / Electronics:
# Cobra 75 WX ST CB w/ 4' Firestik
# Hella 700FF Driving Lights (mounted to bumper)
# 4” driving lights recessed in front bumper
# Carling Technologies Blue lighted rocker switches for lighting control
Interior:
# Nissan Seat Covers
# Nissan pet divider Net
Survival Gear:
#Jetboil Stove & extra fuel canisters. Mountain house rations, lifeboat rations, energy bars.
#2-man tent
#backpacker mattress & pillow, 20 deg sleeping bag
#Candle lanterns, lightsticks, LED flashlights, lots of extra batteries. LED headlamp.
# Katadyn water purification, iodine tablets.
# First aid kits.
# 2 gal collapsable bucket.
# rope & parachute cord.
# multitool
# Extra clothes & layers
# SPOT satellite tracker unit
Future Mods to-do list:
# Expedition roof rack and lighting.
# Fabricate full skid plates underneath.
# Full titan suspension & diff swap, lockers & gearing
# 35’s (if gearing/lockers ever come available)
# Stereo system upgrade
# Scangauge
# Fabricate a New design rear bumper with armored corners & integral steps.
# Gas & water cans storage.
# More winch, hi-Lift and recovery accessories.
# Extra battery in rear expanded storage compartment with battery isolator.
# ARB fridge
PHOTOS
Sliders fabrication

Sliders mounting

Checking the fit

Sliders installed

Rear bumper fabrication


Rear bumper done

PRG suspension install

New tires (285 XTX’s) Looks SO much better!

My drop in roof rack

Starting a new front bumper


Filler plates finally done

Bumper back from the powder coater


