

So it looks like ShrockWorks sells 3 pin winch jacks that mount into their bumpers. Blessed with four pins, the Mile Marker winches won't work with the ShrokWorks parts. Up until this point using the winch meant pulling the plastic pins holding the top of the grill in place and reaching in to reach the winches jack.
I found this set on-line at Wiringproducts.com for a pretty reasonable cost so I thought I'd try them out. They do sell cheaper 4-pin sets that are chrome vice these zinc ones which are a bit more.
![Image]()
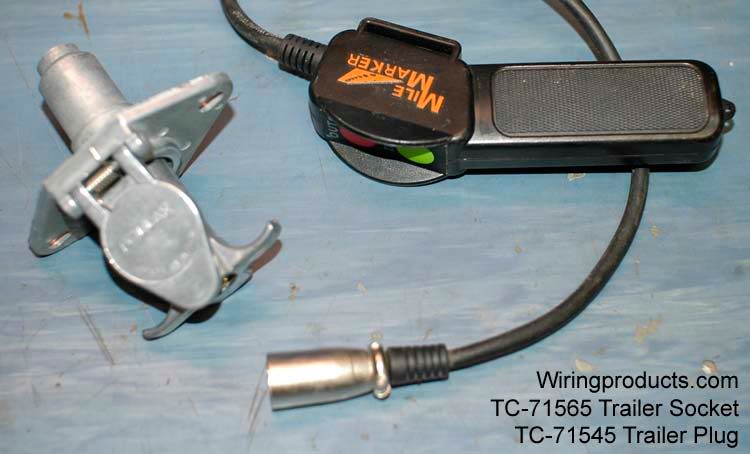
Here's the MileMarker plug next to the trailer plug for size comparison. This is one beefy and solid plug.
![Image]()
I took a bit of four conductor cable, cut the stock plug off and connected the stock plug to the cable and then into the trailer jack. Here's a look at the jack in a picture taken while the bumper was off for the original installation.
![Image]()
The trailer plug got mounted into the bumper. I had to drill two holes in the steel of the ShrockWorks bumper. Pretty thick stuff but no match for a high speed drill.
![Image]()
The plug is very solid in use. The lid of the plug is spring loaded and has a hook which catches the plug to lock it in place.
![Image]()
I got a big yellow hook for the rescue action.
![Image]()
Anyone with good soldering skills can do this. The trailer plug and jack attach to the wires with little screws. You do need to solder tin the ends prior to connecting them into the replacement plug and jack. The stock jack is the toughest to work at as it's pretty light weight. Once in place I ran a bead of silicone around the jack's body sealing it to the winch.
Tonight's project is a remote on/off for the winch control and a dual battery set-up.
I found this set on-line at Wiringproducts.com for a pretty reasonable cost so I thought I'd try them out. They do sell cheaper 4-pin sets that are chrome vice these zinc ones which are a bit more.
Here's the MileMarker plug next to the trailer plug for size comparison. This is one beefy and solid plug.

I took a bit of four conductor cable, cut the stock plug off and connected the stock plug to the cable and then into the trailer jack. Here's a look at the jack in a picture taken while the bumper was off for the original installation.

The trailer plug got mounted into the bumper. I had to drill two holes in the steel of the ShrockWorks bumper. Pretty thick stuff but no match for a high speed drill.

The plug is very solid in use. The lid of the plug is spring loaded and has a hook which catches the plug to lock it in place.

I got a big yellow hook for the rescue action.

Anyone with good soldering skills can do this. The trailer plug and jack attach to the wires with little screws. You do need to solder tin the ends prior to connecting them into the replacement plug and jack. The stock jack is the toughest to work at as it's pretty light weight. Once in place I ran a bead of silicone around the jack's body sealing it to the winch.
Tonight's project is a remote on/off for the winch control and a dual battery set-up.


